All products have been rigorously tested to meet the latest codes. Activates at 117 degrees f.
Jual Thermostatic Shower Faucet Shower Mixer Valve, Anti-Scald Faucet - Jakarta Timur - Kunam Balap | Tokopedia

To install, simply unscrew the existing showerhead or tub spout, wrap pipe tape around the exposed threads, caulk around the opening for a tub spout, then attach the new fixture.
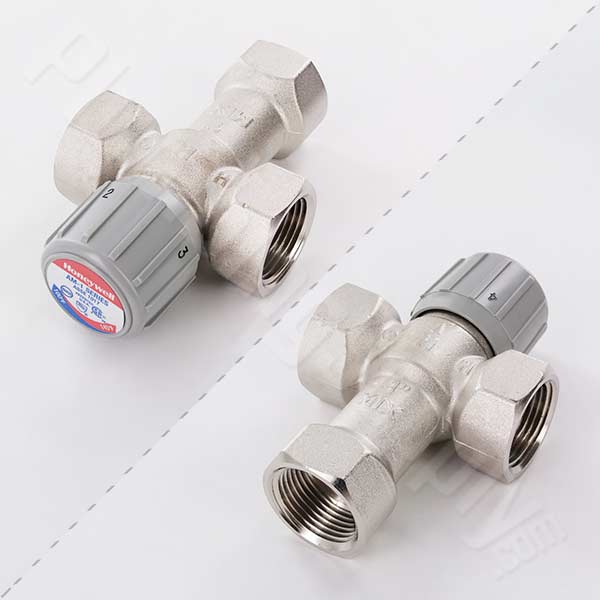
Anti scald device. When the water reaches an unsafe temperature. This element expands and contracts in response to temperature changes. Conforms to international safety standards:
When there isn't enough cold, the device senses that and regulates hot water pressure. Quick installation and fits most showers, taps and baths. This could be a knob or a lever.
For canada orders please call. Typical regular size for a faucet aerator is 15/16 male threaded or 55/64 female threaded, while junior size is 13/16 male threaded or 3/4 female threaded. 3.5 out of 5 stars 21.
The device mixes hot and cold water inside a chamber that contains a thermostat element. It's common for showers to have issues dispensing hot water. Two common types are pressure balance.
Enter the quantity to purchase when you get to shopping cart. However, by default, most water heaters are set at 140. Because water temperatures can overheat causing burns in under 5 seconds.
Prior to 1985, there was a very limited selection of faucets, styles, and finishes. Hot water can be very dangerous. Specify and install with confidence!
Simple and effective scald prevention: Install one at the bathroom sink, shower, and kitchen sink and put your mind at ease, knowing that the chance of a severe burn is greatly reduced! Jump to full code chapter.
Two degrees higher, 120 f, will make you feel immediately. Features of our anti scald device. Two common types are pressure balance.
The antiscald asse 1062 approved thermostatic sink device that reduces water flow through the fixture to.25 gpm if water temperature exceeds 117 degrees f. At 118 degrees, most adults will feel pain.
A few simple steps here. Click to see full answer.

Amazon.com : Toro Co M/R Irrigation L7010 Anti-Siphon Valve, 1-Inch : Automatic Lawn Irrigation Controllers : Patio, Lawn & Garden
Either condition allows pressurized water to spray out of the valve when the faucet or sprinkler is on.

Repair anti-siphon valve leaking. Either condition allows pressurized water to spray out of the valve when the faucet or sprinkler is on. How to repair a leaking sprinkler manifold. It sounds like the valve is not closing, perhaps it has some dirt or other material blocking it.
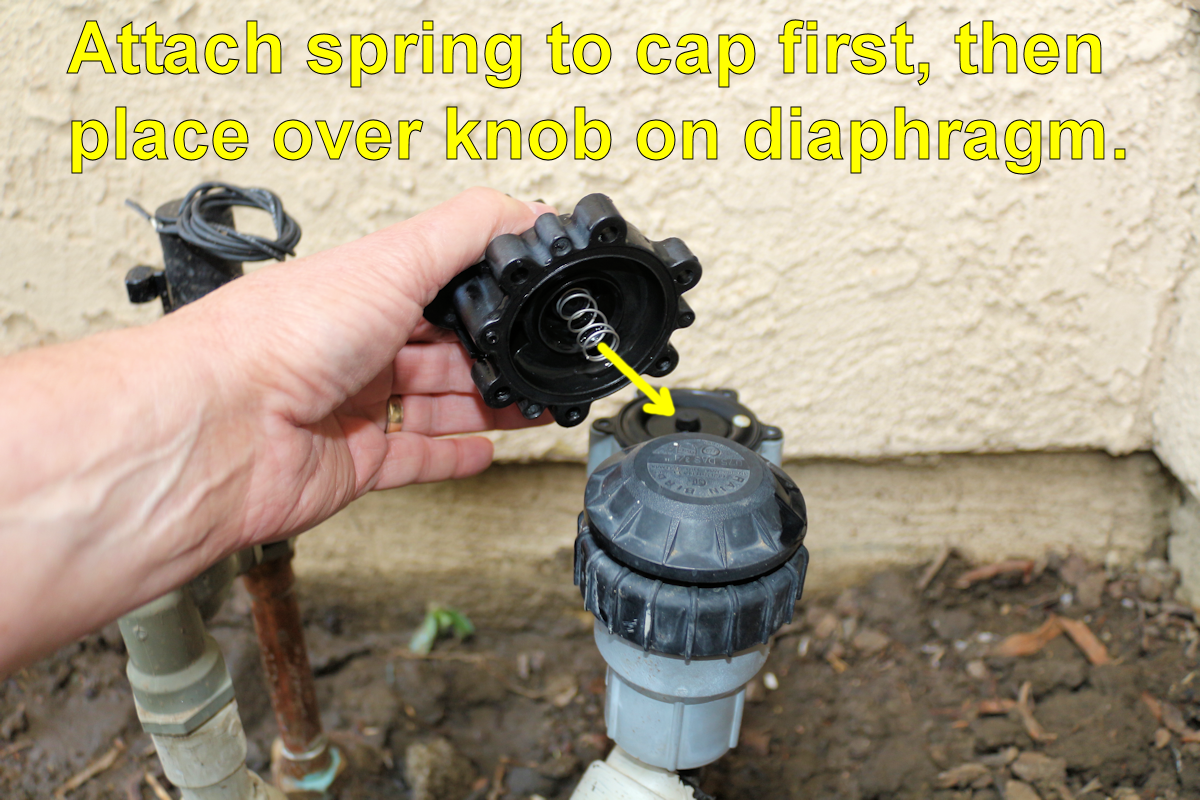
You might disassemble and clean it and replace any worn or broken pieces. Photo 1 shows a typical valve; Subsequently, one may also ask, why is my anti siphon valve leaking?
Either way, it's a matter of placing the parts back into the valve body according to the diagram in the kit and then screwing the cap back on. Therefore, you'll need to cut off the piece of pvc pipe that runs into the bottom of. When a lawn or garden sprinkler head is not turning off, still leaking water when it should be off, it may be due to debris inside the valve or because the.
Putting the plunger into the casing. You can either choose to eliminate any type of sort of dust within it out (if your very own has the system to do so), or you can transform the. Turn the water supply back on and you're done.
Just follow these easy steps. These just screw on and tighten down with a screw. Water leaking from this area is a common occurrence.
Turn off the water to the sprinkler system. The inner workings start to fail after 10 to 20 years, especially when it comes to rubber seals and similar matters. Click to see full answer.
Turn off the water supply. Many times, the fix is simple, economical, and effective without needing to pay someone to make a costly valve replacement. Put the plunger into the casing.
The sand in his well water was clogging the anti siphon valve and causing it to drip. There is a screwdriver slot on top of the flow control in the center of the knob. The problem could also be a worn poppet or rubber gasket.
Ensure to analyze that you appropriately closed the shutoff before you tension. Install the casing (with the plunger in it) into the opening on the top of the spigot. With a couple parts and two tools.
How do you fix a leaky sprinkler manifold? A customer of mine had a leaking faucet, but it wasn't what you think. Either condition allows pressurized water to spray out of the valve when the faucet or sprinkler is on.
(it may require a trip to the plumbing store):
Make life easier on yourself by turning off the water to your sprinkler system. It is very common for outdoor faucets, or out.

Redundant Anti-Siphon Diagram – Plast-O-Matic Valves, Inc.
They may punch them out to test them but i'll guarantee they replace them after diagnoses.

How to replace the anti siphon valve. A few simple steps here. If the shutoff you merely taken care of does not start advancement the controller till that valve/station starts. In this step, you will have to saw off the pipe that is connected to the valve.
Screw on the lock nut and, pressing down on the fill valve's lower shank, tighten the lock nut securely by hand. However, if yours does not, you will need to install one. Many anti siphon valves come with a sprinkler head attached;
Put the plunger into the casing. It should slide into place. Add the screws back in, securing it gently.
Change the controller to manual as well as likewise start the system watering. Turn off the water and power to the sprinkler system before attempting to replace the valve. No more leaky valves.get this, and all the things we've used on doityourselfdad here:.
Install the washer that came with the valve onto the threaded connection and insert the connection in the hole in the bottom of the tank. Answered feb 19, 2021 at 3:14. A control valve usually has the inlet and outlet ports in a straight line.
These just screw on and tighten down with a screw. Turn the water supply back on and you're done. Twist the solenoid, the black cylinder with wires on top, from the valve counterclockwise and set it.
A step by step tutorial on how to replace or upgrade a sprinkler valve. Putting the plunger into the casing. Either way, it's a matter of placing the parts back into the valve body according to the diagram in the kit and then screwing the cap back on.
Use the pvc primer on the female connectors and both ends of the pipe. The anti siphon valves purpose is to open when suction is applied from the pump. The easiest way to deal with these valves is to buy the exact replacement and swap out the internal components.
It's there for a reason. Install the casing (with the plunger in it) into the opening on the top of the spigot. Hook the refill tube connected to the outlet on the valve to the overflow tube with the.
If the valve body is leaking, try snugging down the screws evenly.
Take a hack saw and cut off the piece of pvc pipe that. Screw on the lock nut and, pressing down on the fill valve's lower shank, tighten the lock nut securely by hand.
Rainbird Anti-Siphon Valve Leaks, Won't Fully Close
Turn off the water supply.

Repair anti-siphon vent leaking. Click to see full answer. Either condition allows pressurized water to spray out of the valve when the faucet or sprinkler is on. These just screw on and tighten down with a screw.
Questions as well as likewise discussions worrying shower rooms, sinks, faucets, water drain, broadcasting air vent, water house heating, showers. I didn't leave the hose attached over the winter, so i don't think it's a freeze/burst issue. Turn off the water to the sprinkler system by.
A few simple steps here. Click to see full answer. Putting the plunger into the casing.
The problem could also be a worn poppet or rubber gasket. I had a leaking valve and replaced the entire piping assembly and two valves after too much troubleshooting. Either way, it's a matter of placing the parts back into the valve body according to the diagram in the kit and then screwing the cap back on.
Whats happening is when i turn on the 2nd zone ( which has 4 heads on it ) the valve that has the 11 is leaking probably about a 12 ounce bottle of water out of the siphon part of the valve before it seals back off. It's a 1/4 turn valve made by mueller, looks like this. There's no leak inside the house and the valve shuts off completely.
One zone works fine, the second is a problem. Subsequently, one may also ask, why is my anti siphon valve leaking? The valve parts can also degrade and crack, rubber parts can get old and stiff, or the valve can be damaged by water freezing inside the spigot.
There is a screwdriver slot on top of the flow control in the center of the knob. On most household spigots, it can be handled by the average homeowner with a screwdriver and a pair. Install the casing (with the plunger in it) into the opening on the top of the spigot.
In these cases, the valve can be replaced. Hook the refill tube connected to the outlet on the valve to the overflow tube with the. Turn the water supply back on and you're done.
But the valve with the smaller number of heads won't leak if i turn it off and the other on. You might disassemble and clean it and replace any worn or broken pieces. Either condition allows pressurized water to spray out of the valve when the faucet or sprinkler is on.
It sounds like the valve is not closing, perhaps it has some dirt or other material blocking it. Put the plunger into the casing. Install the washer that came with the valve onto the threaded connection and insert the connection in the hole in the bottom of the tank.
For irrigation purposes, it prevents water from the system from being siphoned back into the water supply line. Ratings (72) (36) (1) (36)connection:
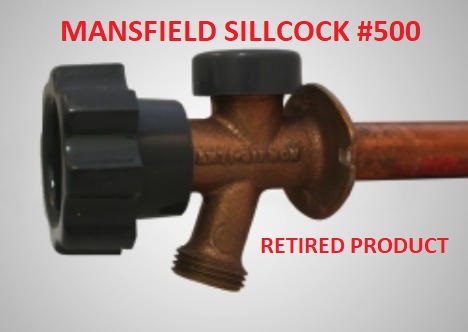
Frost-Proof Sillcock Installation& Leak Repair
Best seller in ball valves.
Anti siphon hose bib repair. Supplies to replace a hose bib. Get it as soon as wed, jun 1. 4.3 out of 5 stars 438.
In most cases, a leak can be fixed by finding the packing nut under the spigot and tightening it. 4.3 out of 5 stars 130. With this hose bib the water line extends all the way through the exterior wall and hose bib threads onto the pipe itself.
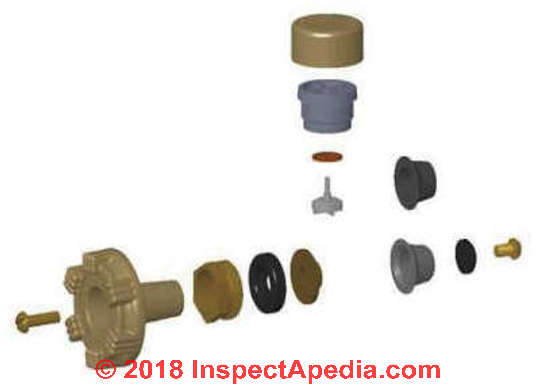
Pop the cap back on, or screw it on and tighten. Screw the new vacuum breaker assembly onto the faucet housing and tighten it with pliers. Free shipping on orders over $25 shipped by amazon.
Mip x mht brass hose bibb: 4.4 out of 5 stars 748. Free shipping on orders over $25 shipped by amazon.
Price $ 3 47 $ 6 19 $ 6 20 $ 6 98. It only cost about $20. Anti siphon valve hose bib vacuum breaker water spigot wall hydrant.
However, if this is ineffective, it may be necessary for you to replace the entire fixture. Some types of faucets can cost over $1000. In some homes this can be h.
If you want to get the valve professionally replaced, you will have to pay for labor too. Get it as soon as mon, jun 6. This is a simple process that requires only a wrench.
I will rob the stem assembly from the new hose bib and insert it into the old (still good) hose bib. Inspect your hose bib to understand how it works and what the problem is. Get it as soon as thu, may 26.
Diy home improvement information | doityourself.com 4.4 out of 5 stars 445. So, if one needs to repair a leaky vacuum breaker it is easier, more cost effective, and less time.
How to replace the vacuum breaker on a frost free silcock valve 1 what is an anti siphon water spigot?
-
I Wish It Was 1989 Lyric video YouTube . Web I Wish It Was 1989 Lyric video Scouting For Girls 69K subscribers Subscribe 197 7.9K vie...
-
Come to find out theres a scientific reason as to why it. For centuries some have used marsh mallow. Can Marshmallows Treat A Sore Throat ...
-
The amtrol selection tool should be used as a general guide to sizing amtrol products. Factory precharge psig ship wt. Amtrol Well-X-Trol...


i wish it was
I Wish It Was 1989 Lyric video YouTube . Web I Wish It Was 1989 Lyric video Scouting For Girls 69K subscribers Subscribe 197 7.9K vie...

